You can provide row-level security with security filters. While editing a model, you can add and delete security filters from entities, and modify existing ones, as well as configure and use an LDAP security provider. All of these functions are in the Model Editor, which you can access from the Administrator Dashboard.
To use an Active Directory® or LDAP security provider
When using a Lightweight Directory Access Protocol (LDAP) security provider, you can create User Context attributes that map to LDAP user attributes, and use them in security filter expressions to enable single sign-on for your users.
Use an LDAP security provider
- In the Configuration section of the Administrator Dashboard, click Security Provider. The Custom security provider drop-down list appears.
- From the drop down list box, select Active Directory.
- In the Security Provider Settings that appear, enter a value for each of the properties.
- Below the Security Provider Settings, in the Define mappings section, click on Add row button..
- In the boxes that appear, enter a valid User Context Attribute Name, and a LDAP User Attribute Name that you will be able to select when you create security filters in the model editor. (See the To create a new security filter section below.)
To add your new security provider to the server
Once you have compiled your custom security provider into a DLL, you can begin using it to filter entities in your models.
Add a new security provider
- In Windows Explorer, create a SecurityProviders folder on the same level as your site, for example, if you have C:\ActiveReports 12 Server, create the folder C:\ActiveReports 12 Server\SecurityProviders.
- Copy your custom security provider DLL file into the new folder.
- In the Configuration section of the Administrator Dashboard, click Security Provider. The Custom security provider drop-down list appears.
- Drop down the list and select your new security provider.
- Depending on your security provider, there may be settings that you can select.
- When you have the settings the way that you want them, click the Apply changes button. The security filter becomes available to your model entities.
To delete a security provider
You can stop the server site and remove security providers from ActiveReports Server.
Delete a security provider
- Open Internet Information Services (IIS) Manager, and expand the Sites node.
- Select the ActiveReports 12 Server site, and on the right, in the Manage Web Site section, click Stop.
- In Windows Explorer, locate your SecurityProviders folder.
- Delete the DLL containing the security provider that you long longer wish to use. The provider is removed from the list.
- Back in IIS, with the ActiveReports 12 Server site selected, in the Manage Web Site section, click Start.
To create a new security filter
When you create a security filter, you can re-use it for other entities that contain the attribute on which the filter expression is based, providing row-level security for your data.
Create a new filter
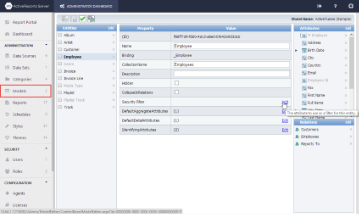
- Select the model to which you want to add a filter, and then click Edit model button. The model editor appears.
- Select the entity that you want to filter. The editable properties appear in the center workspace.
- Next to Security Filter, click the Add command. The Edit Security Filter dialog appears.
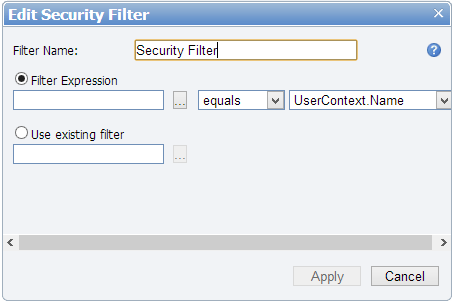
- In the box next to Filter Name, enter a name for your filter.
- With Filter Expression selected, click the ellipsis button to open the Select Attribute dialog where you can select an attribute of the entity on which to filter data, and click OK.
- Drop down the list next to the attribute to select whether to display data that equals or does not equal the following value.
- Drop down the list to the right, and select a User Context Attribute Name mapping against which to filter the selected attribute.
- Click the Apply button to create the filter, or to discard the changes, click Cancel.
To use an existing filter
You can re-use security filters with other entities that use the same attributes.
Use an existing filter
- In the Administration section of the Administrator Dashboard, click Models. The Models list appears.
- Select the model to which you want to add a filter, and then click Edit model button. The model editor appears.
- Select the entity that you want to filter. The editable properties appear in the center workspace.
- Next to Security Filter, click the Add command. The Edit Security Filter dialog appears.
- In the box next to Filter Name, enter a name for your filter.
- With Use existing filter selected, click the ellipsis button to open the Select Existing Filter dialog where you can select a previously created filter (if it is based on an attribute shared by this entity), and click OK.
- Click the Apply button.