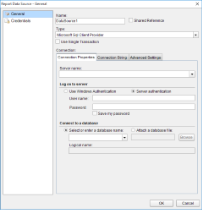
You can access the Report Data Source dialog from the Report Explorer by doing one of the following:
- Click the Add icon on the top left and select Data Source.
- Right-click the Data Sources node and select Add Data Source.
The Report Data Source dialog provides the following pages where you can set data source properties:
General
The General page of the Report Data Source dialog is where you can set the Name, Type, and Connection string of a new data source, or choose to use a shared data source reference.
- In the Name field, you can enter a name for the data source. This name must be unique within the report. By default, the name is set to DataSource1.
- In the Shared Reference checkbox, you can select a shared data source reference. See Connect to a Data Source for further information. Once you have chosen the Shared Reference option, the Reference field to select a Shared Data Source becomes available. In the Reference field, you can choose from the following options:
- From Server - select a server shared data source from the list of data sources to which you have the permission Execute and Create Datasets on the Server.
- From File - select a shared data source file on your local machine.
- If the Shared Reference checkbox is clear, you can select a data source type from the Type dropdown field. ActiveReports supports the following providers:
- You can also select to execute datasets that use this data source in a single transaction by checking the Use Single Transaction checkbox.
- If you select SQL, OleDb, or Oracle as the data source Type value, the Connection Properties, Connection String and Advanced Settings pages appear under the Connection section. For XML data source, Connection Properties and Connection String pages appear. For JSON data source, Schema, Content, and Connection String pages appear. In other data source types, only the Connection String page appears.
Credentials
The Credentials page gives you the following four options for the level of security you need for the data in your report.
Use Windows Authentication
Select this option when you know that any users with a valid Windows account are cleared for access to the data, and you do not want to prompt them for a user name and password.
Use a specific user name and password
Select this option when you want to allow only a single user name and password to access the data in the report.
Prompt for credentials
Select this option when there is a subset of users who can access the data. The Prompt string textbox allows you to customize the text requesting a user name and password from users.
No credentials
Select this option only if the data in the report is for general public consumption.
