In a page report or a RDL report, you can allow the end-user to sort columns of data in the Viewer by setting interactive sorting on a TextBox control within a data region. Follow the steps below to set interactive sorting in a TextBox control.
To set interactive sort properties on a TextBox
These steps assume that you have already added a Page Report (xml-based)/RDL Report template to your project and connected it to a data source and a data set. See Connect to a Data Source and Add a Dataset for further information.
- From the toolbox, drag a Table data region onto the report.
- From the Report Explorer, drag fields into the detail row of the table. Labels appear in the table header row, and expressions appear in the detail row.
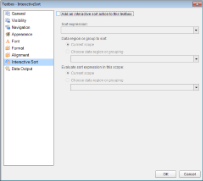
- Click to select a TextBox in the header row on which you want to allow users to sort, and in the Commands section at the bottom of the Properties Window, click the Property dialog command.
- In the TextBox dialog that appears, select the Interactive Sort page.
- Select the checkbox next to Add an interactive sort action to this textbox and enable the other properties on the page.
- Under Sort expression, drop down the list and select the expression containing the value of the field on which you want to provide sorting.
Note: Under Data region or group to sort, and Evaluate sort expression in this scope, you can optionally choose a different a scope from the Choose data region or grouping drop down list.
- Click OK to close the dialog and accept the changes.
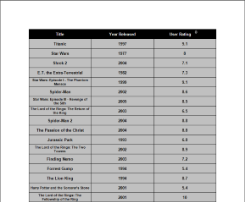
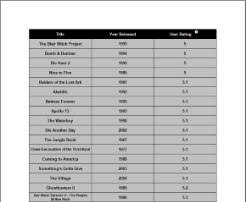
When you preview the report, you can see a sort icon next to the TextBox control, the User Rating header in this case.
You can click the icon to sort in descending order. The icon changes to an up arrow that you can click to sort ascending.


