You can save a data connection type such as an OleDb connection, Json connection, or an XML connection as a Shared Data Source (RDSX). This topic provides the steps to create a shared data source with an OleDb data connection.
To create a shared data source
- Create a new Visual Studio project or open an existing one.
- In the Visual Studio project, add a Page Report or an RDL Report template to create a new report. See Adding an ActiveReport to a Project for further details.
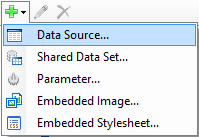
- In the Report Explorer, click the Add icon on the top left and select Data Source...
- In the Report Data Source dialog that appears, go to the General page and set the following properties to create a connection to an OleDb data source.
- Name: Any Name
- Type: Microsoft OleDB Provider
Under Connection, go to the Connection Properties tab and set:
- OLE DB Provider: Microsoft.Jet.OLEDB.4.0
- Server or file Name: Your .mdb file location
- In the Report Data Source dialog, click the OK button to close the dialog. A data source node appears in the Report Explorer.
- In the Report Explorer, right-click the data source and select Share Data Source.
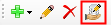
- In the Save Shared Data Source File dialog that appears, enter the file name and click the Save button to save the file in RDSX format. Notice that the data source icon changes to show sharing.
Data Source Icon Shared Data Source Icon 

To connect to a shared data source
In ActiveReports, you can connect to most data sources using the steps in the Connect to a Data Source. However, you need to follow the steps below to connect to a Shared Data Source.
- In the Report Explorer, right-click the Data Sources node and select the Add Data Source option or select Data Source from the Add button.
- In the Report Data Source dialog that appears, select the General page and enter the name of the data source. This name appears as a child node to the Data Sources node in the Report Explorer.
- Check the Shared Reference checkbox on.
- Under Reference, from the drop-down list, select From File... or From Server...
- If you have selected the From File... option, in the Shared Data Source File dialog that appears, go to the folder where your shared data source file is located and select it. A file path appears in the field adjacent to the Browse button.
- If you have selected the From Server... option, in the Server Shared Data Sources dialog that appears, select a server shared data source from the list. You must have the the permission Execute and Create Datasets on the ActiveReports Server to see data sources in this list. If you do not have the Execute and Create Datasets permission to any data sources on ActiveReports Server, then the Server Shared Data Sources dialog will be empty.
- Click the OK button on the lower right corner to close the dialog. A shared data source node appears in the Report Explorer.
To edit a shared data source
These steps assume that you have already connected your report to a shared data source.
- To open the Report Data Source dialog, do one of the following:
- In the Report Explorer, right-click a shared data source node and in the context menu that appears, select Edit.
- In the Report Explorer toolbar, click the Edit Shared Data Source button.
- In the Report Data Source dialog that appears, edit the data connection information.
See Also