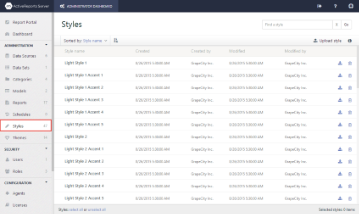
The upload and download operations offer an additional means of backing up or transferring styles between servers without requiring access to the server console. Styles are specially formatted xml files with a file extension of .style.
You can delete and rename styles to control the look of text in the reports your users create, as well as to suggest where they are used for a more consistent company-wide look.
To download a style
Save a working copy of a style to your local machine
- From the Administrator Dashboard, select Styles.
- On the Styles page, next to the stylee that you want to save, click Download style button.
- The xml style file is copied onto your machine in .style format.
Tip: If your browser does not automatically offer you a choice of where to save the file, you can right-click Download and select Save As.
To upload a style
Save a file from your local machine onto the server
- From the Administrator Dashboard, select Styles.
- On the Styles page, click the Upload style button.
- In the Upload an existing report style dialog that appears, you can either drop a .style file or click inside the dotted box to browse to a data source file.
- In the Open dialog that appears, navigate to the file with the extension .style to upload and click Open. The dialog closes and the file name appears in the box.
- Click Upload to add the style from your computer to the server.
To delete a style
You can delete any styles that you do not want your users to access when they design reports.
Remove a style from the list
- From the Administrator Dashboard, select Styles.
- On the Styles page, next to the style that you want to delete, click the Delete style button. The style is removed from the list.
To rename a style
You can name styles to reflect where and how they are used in your company to keep your users consistent.
Make a style name relevant for your users
- From the Administrator Dashboard, select Styles.
- On the Styles page, select a style from the list, and then click the style properties button to display the properties.
- In the Name box, enter the name to update.
