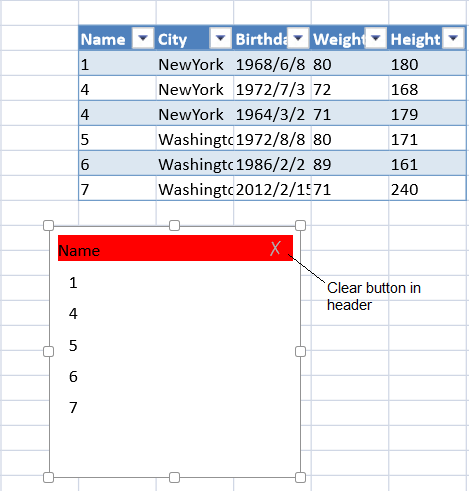
You can use a built-in style or set a style for specific areas such as the header.

Refer to the SlicerStyles class for a list of built-in styles. Refer to the SlicerStyle class for a list of specific areas and the SlicerStyleInfo class for the styles that can be changed. Use the SlicerBorder class to create a border for a style.
Using Code
This example creates a table and adds a slicer with a header style.
| JavaScript |
Copy Code
|
|---|---|
| //create a table datas = [ ["1", "NewYork", "1968/6/8", "80", "180"], ["4", "NewYork", "1972/7/3", "72", "168"], ["4", "NewYork", "1964/3/2", "71", "179"], ["5", "Washington", "1972/8/8","80", "171"], ["6", "Washington", "1986/2/2", "89", "161"], ["7", "Washington", "2012/2/15", "71", "240"]]; var table = activeSheet.tables.addFromDataSource("table1", 2, 2, datas); dataColumns = ["Name", "City", "Birthday", "Weight", "Height"]; table.setColumnName(0, dataColumns[0]); table.setColumnName(1, dataColumns[1]); table.setColumnName(2, dataColumns[2]); table.setColumnName(3, dataColumns[3]); table.setColumnName(4, dataColumns[4]); var hstyle = new GC.Spread.Sheets.Slicers.SlicerStyleInfo(); hstyle.backColor("red"); var style1 = new GC.Spread.Sheets.Slicers.SlicerStyle(); style1.headerStyle(hstyle); //add a slicer to the sheet and return the slicer instance. var slicer = activeSheet.slicers.add("slicer1",table.name(),"Name"); //change the slicer properties. slicer.width(200); slicer.height(200); slicer.position(new GC.Spread.Sheets.Point(100, 200)); slicer.style(style1); |
|