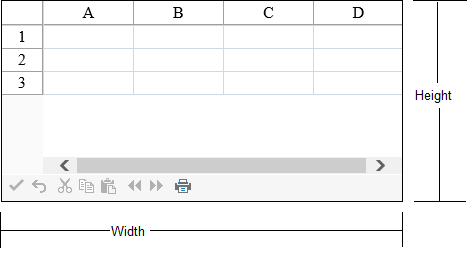
You can set the overall dimensions of the component and these remain the same regardless of the size of the sheet or the amount of navigation bars. If there are more rows in a sheet than can be displayed, then the component creates pages inside the component to allow you access to those rows. Refer to Customizing Page Navigation for more information. If you display hierarchy information and page navigation bars, then the amount of space dedicated to the sheet is smaller. All the tool bars, scroll bars, and sheet appear inside the overall dimensions of the component. Refer to Customizing the Tool Bars for more information.
The following figure shows the dimensions that you can set by setting the number of pixels for each.

Using the Properties Window
Set the dimensions at design time with the Properties window of Visual Studio .NET.
- Select the component.
- With the Properties window open, in the Layout category, select the Height property or the Width property and type in a new value. The unit is pixels. Press Enter. The new dimension is now set.
Refer to the Microsoft .NET Framework documentation for setting the units of measurement for height to something other than the default, which is pixels.
Using Code
Add a line of code that sets the specific dimension using the Height or Width properties of FpSpread class or both. The default for the unit of measurement is pixels.
Example
This example shows how to set the height of the component to 200 pixels and the width to 400 pixels.
| C# |
Copy Code
|
|---|---|
FpSpread1.Height = 200; FpSpread1.Width = 400; |
|
| VB |
Copy Code
|
|---|---|
FpSpread1.Height = System.Web.UI.WebControls.Unit.Pixel(200) FpSpread1.Width = System.Web.UI.WebControls.Unit.Pixel(400) |
|