The filter bar allows filtering in all columns by displaying a filter bar below the column header area. The filter icon appears in the filter bar instead of the column header. The filter bar displays filter information and allows users to edit the condition criteria for each filter column.
The filter bar contains a text box, a menu of choices, and the filter icon. The user can enter a filter item in the text box, select a menu option, and then click on the filter icon to apply the filter.
The MenuType property specifies the type of menu options that are displayed for the filter (number, date time, enhanced, or text). If the menu type is date, a date time picker is also available in the filter bar. The automatic option displays the menu options based on the type of data in the column.
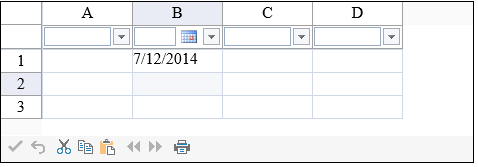
The following image displays a date picker in the filter bar for column B.
The following table lists the menu options for text, number, and date:
| Filter | Menu Options |
|---|---|
| Text | Contains |
| DoesNotContain | |
| StartsWith | |
| EndsWin | |
| EqualTo | |
| NotEqualTo | |
| Between | |
| NotBetween | |
| IsEmpty | |
| NotIsEmpty | |
| IsNull | |
| NotIsNull | |
| Number and Date | EqualTo |
| NotEqualTo | |
| GreaterThan | |
| LessThan | |
| GreaterThanOrEqualTo | |
| LessThanOrEqualTo | |
| Between | |
| NotBetween | |
| IsNull | |
| NotIsNull |
The FilterBarMode property specifies whether the filter context menu data is requested from the server after the page is loaded or loaded in the server before the page is rendered.
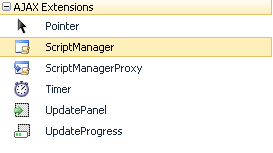
Set the DateTimeFormat or FormatString property to format the value from the date picker in the filter bar. Set these properties if the format of the data in the cell is different from the format in the filter. The EqualTo menu option requires that the cell format and the filter bar format be the same. A ScriptManager is required for the DateTimeFormat and FormatString properties.
Using Code
- Create a filter bar cell if you wish to customize the default options in the filter bar.
- Set the AutoFilterMode property to FilterBar.
Example
This example code customizes the filter bar and using a filter bar for filtering.
| C# |
Copy Code
|
|---|---|
|
protected void Page_Load(object sender, EventArgs e) FarPoint.Web.Spread.FilterBarCellType fbc = new FarPoint.Web.Spread.FilterBarCellType(); |
|
| VB |
Copy Code
|
|---|---|
|
Private Sub Page_Load(ByVal sender As System.Object, ByVal e As System.EventArgs) Handles MyBase.Load Dim fbc As New FarPoint.Web.Spread.FilterBarCellType() |
|