This topic illustrates how simple it is to use a C1TabStrip as a navigational tool for your ASP.NET AJAX-Enabled Website projects.
Step 1: Create a Master Page and Add a C1TabStrip to the Page
Complete the following steps:
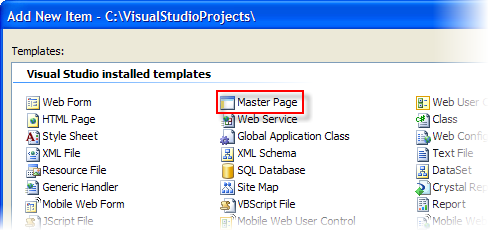
1. In the Solution Explorer window, right-click on your project and select Add New Item from the menu.
The Add New Item dialog box appears.
2. Choose Master Page from the list of installed templates and then click Add to close the Add New Item dialog box.
3. Select a Script Manager control from the toolbox and add it to the MasterPage.master page.
4. From the toolbar, select Layout | Insert Table to open the Insert Table dialog box.
5. In the Insert Table dialog box, click the Template radio button and then select Header from the drop-down list.
6. Press OK to close the Insert Table dialog box.
A table with two rows - a header row and a content row - is added to your Web page.
7. Drag the ContentPlaceHolder into the content row of your new table.
8. Place your cursor in the header of the table and, in the Toolbox window, double-click C1TabStrip.
A C1TabStrip control appears in the header of your table.
Step 2: Create Content Pages and Add Controls
Complete the following steps:
1. In Source view, Right-click on Masterpage.master and select Add Content Page. Repeat this step to add another page.

2. You will need three pages to complete this task, but one of those pages, Default.aspx, was added by default when you created your Web page; you will have to set it up to call from the master page. To set Default.aspx to draw content from the master page template, switch to Source view and replace the default markup with the following:
<%@ Page Language="C#" MasterPageFile="~/MasterPage.master" AutoEventWireup="true" CodeFile="Default.aspx.cs" Inherits="_Default" Title="First Page" %>
<asp:Content ID="Content1" ContentPlaceHolderID="ContentPlaceHolder1" Runat="Server">
</asp:Content>
3. In Design view, place the following controls into the ContentPlaceHolders of each page:
• On the Default.aspx page, add a Calendar control to the ContentPlaceHolder.
• On the Default1.aspx page, add a Button control to the ContentPlaceHolder.
• On the Default2.aspx page, add a TextBox control to the ContentPlaceHolder.
Step 3: Bind C1TabStrip's Tabs to the Content Pages
Complete the following steps:
1. Select MasterPage.master and switch to its Design view.
2. Click
C1TabStrip's smart tag (![]() ) to open the C1TabStrip Tasks menu and select TabStrip
Designer.
) to open the C1TabStrip Tasks menu and select TabStrip
Designer.
The C1TabStrip Designer Form appears.
3. In treeview, select Tab1 to reveal a list of its property and then set its NavigateUrl property to "Default.aspx".
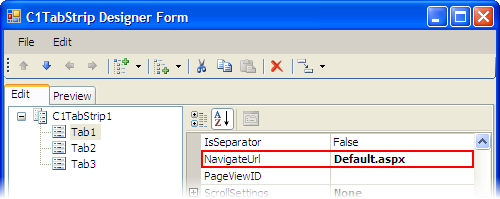
4. Set the NavigateUrl property of the next two tabs as follows:
• Set Tab2’s NavigateUrl property to "Default2.aspx".
• Set Tab3’s NavigateUrl property to "Default3.aspx".
5. Click OK to close the C1TabStrip Designer Form.
Step 4: Add Code to the Project to Select the Correct Tab Between Page Views
You can run the project after completing the first three steps and still use the C1TabStrip for navigation; however, the C1TabStrip will not retain its state between page views and the correct tab won't be selected. To solve this problem, you can use the FindTabByNavigateUrl method in combination with the Selected property to select the proper tab.
To add the aforementioned solution to your project, add the following code to the Page_Load event of MasterPage.master:
Dim tab As C1.Web.UI.Controls.C1TabStrip.C1Tab = Me.C1TabStrip1.FindTabByNavigateUrl(Me.Request.RawUrl)
If tab IsNot Nothing Then
tab.Selected = True
End If
• C#
C1.Web.UI.Controls.C1TabStrip.C1Tab tab = this.C1TabStrip1.FindTabByNavigateUrl(this.Request.RawUrl);
if (tab != null)
tab.Selected = true;
Step 5: Run the project
Press F5 to run the project and observe that you can use C1TabStrip to navigate through your Web site. Tab1 brings up page with the Calendar control; Tab2 brings up the page with the Button control; and Tab3 brings up the page with the TextBox control. Also note that the proper tab is selected between page views and upon refresh.
|