The following steps will walk you through setting up the calendar for a 10-hour day, four-day work week, including setting the start day time, end day time, the time scale, and week start properties. Complete the following to customize the calendar:
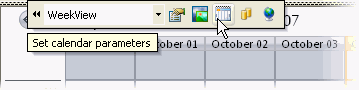
- On the C1Schedule Smart Designer, click the Calendar Settings button. For more information on accessing the C1Schedule Smart Designer, see C1Schedule Smart Designer.
- Set the start and end day times by setting the StartDayTime and EndDayTime properties in the Smart Designer or in code.
In the Designer
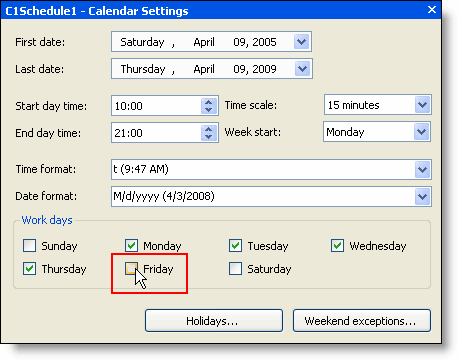
- In the Calendar Settings dialog box, set the Start day time box to 10:00 (AM) and set the End day time box to 21:00 (9:00 PM).
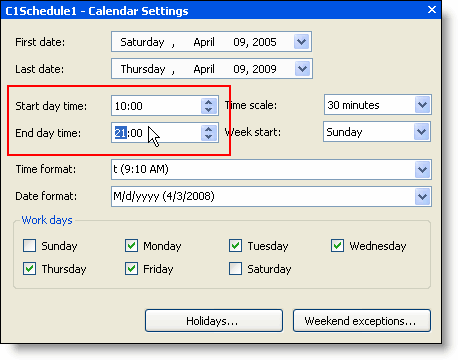
- Don't close the dialog box.
In Code
- Add the following code to the Form_Load event to set the StartDayTime property to 10:00 AM and the EndDayTime property to 21:00 (9:00 PM):
To write code in Visual Basic
Visual Basic Copy CodeMe.C1Schedule1.CalendarInfo.StartDayTime = New TimeSpan(10, 0, 0) Me.C1Schedule1.CalendarInfo.EndDayTime = New TimeSpan(21, 0, 0)
To write code in C#
C# Copy Codethis.c1Schedule1.CalendarInfo.StartDayTime = new TimeSpan(10, 0, 0); this.c1Schedule1.CalendarInfo.EndDayTime = new TimeSpan(21, 0, 0);
- In the Calendar Settings dialog box, set the Start day time box to 10:00 (AM) and set the End day time box to 21:00 (9:00 PM).
- Set the time scale by setting the TimeScale property in the Smart Designer or in code.
In the Designer
- In the Calendar Settings dialog box, set the Time scale drop-down to 15 minutes.
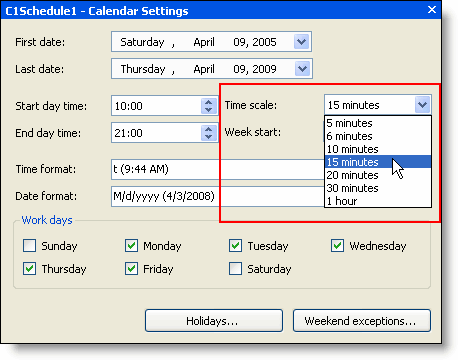
- Don't close the dialog box.
In Code
- Add the following code to the Form_Load even to set the TimeInterval property to 15 minutes using the TimeScaleEnum enumeration:
To write code in Visual Basic
Visual Basic Copy CodeMe.C1Schedule1.CalendarInfo.TimeInterval = C1.C1Schedule.TimeScaleEnum.FifteenMinutes
To write code in C#
C# Copy Codethis.c1Schedule1.CalendarInfo.TimeInterval = C1.C1Schedule.TimeScaleEnum.FifteenMinutes;
OR
- Add the following code to the Form_Load event to set the TimeScale property to 15 minutes by assigning a value:
To write code in Visual Basic
Visual Basic Copy CodeMe.C1Schedule1.CalendarInfo.TimeScale = New TimeSpan(9000000000)
To write code in C#
C# Copy Codethis.c1Schedule1.CalendarInfo.TimeScale = new TimeSpan(9000000000);
Note: The TimeScale property cannot be set to any arbitrary value. When assigning a value to this property it is automatically calculated so as to be equal to the nearest TimeScaleEnum enumeration value.
- In the Calendar Settings dialog box, set the Time scale drop-down to 15 minutes.
- Set the week start day by setting the WeekStart property in the Smart Designer or in code.
In the Designer
- In the Calendar Settings dialog box, set the Week start drop-down to Monday.
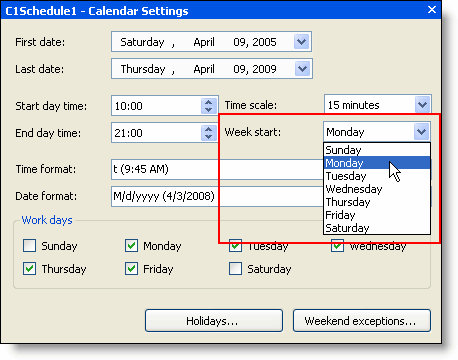
- Don't close the dialog box.
In Code
- Add the following code to the Form_Load event to set the WeekStart property to Monday:
To write code in Visual Basic
Visual Basic Copy CodeMe.C1Schedule1.CalendarInfo.WeekStart = DayOfWeek.Monday
To write code in C#
C# Copy Codethis.c1Schedule1.CalendarInfo.WeekStart = DayOfWeek.Monday;
- In the Calendar Settings dialog box, set the Week start drop-down to Monday.
- Set the work days by setting the WorkDays property in the Smart Designer:
- In the Calendar Settings dialog box under Work days, uncheck Friday.
- In the Calendar Settings dialog box under Work days, uncheck Friday.
- Close the Calendar Settings dialog box.
Run the application and observe the following:
The scheduling application displays a 4-day work week when in the Work Week view.
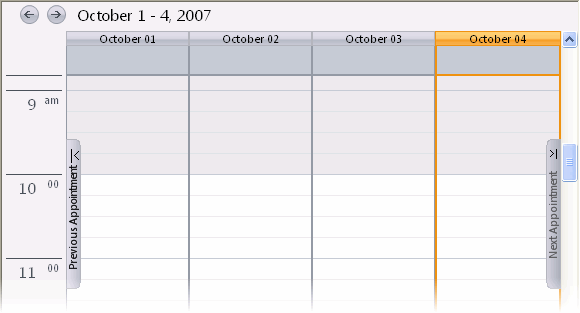
Congratulations! You have successfully set the calendar settings for a 10-hour day, four-day work week. This concludes the Quick Start.