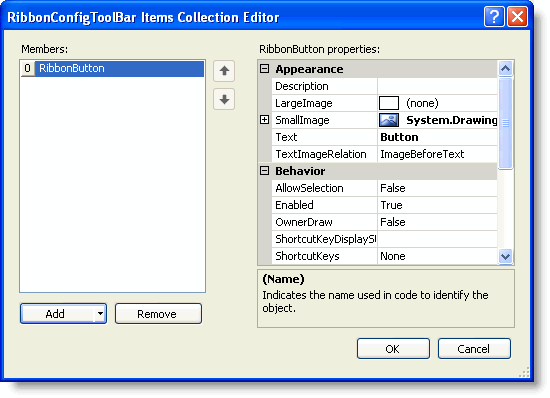
The configuration toolbar (RibbonConfigToolBar) can contain as many commands as needed. To add Ribbon items to the configuration toolbar, complete the following steps:
Adding Items to the Configuration Toolbar Using the Properties Window
Complete the following steps:
- Click the Ribbon to reveal the list of properties in the Properties window.
- Expand the ConfigToolBar property node, select the Items property and click the ellipsis button at the right side of the (Collection).
The RibbonConfigToolBar Items Collection Editor appears. - Click the Add drop-down button and select RibbonButton from the list. The item is added to the Members list.

- In the RibbonButton's Properties window, set the following properties:
- By default, the RibbonButton.Text property is set to Button. Delete the text.
- Click the RibbonItem.SmallImage property drop-down button, then click the second drop-down button and choose the Help image from the list.
- Click OK to close the collection editor.
Adding Items to the Configuration Toolbar Programmatically:
Note: The following example uses an embedded resources containing an image. To embed a resource, from the Project menu, choose YourProjectName Properties. From the Resources tab, select Add Resource and choose to add an existing file or add a new one.
To add items to the configuration toolbar programmatically, add the following code to your Form_Load event:
To write code in Visual Basic
| Visual Basic |
Copy Code
|
|---|---|
my.C1Ribbon1.ConfigToolBar.Items.Add(new RibbonButton(Properties.Resources.question)) |
|
To write code in C#
| C# |
Copy Code
|
|---|---|
this.C1Ribbon1.ConfigToolBar.Items.Add(new RibbonButton(Properties.Resources.question)); |
|
This topic illustrates the following:
The following configuration toolbar provides quick access to the Help button:
