The quick start guides you through the steps of adding a ComboBox control to your MVC web application and add data to it. For information on how to add ASP.NET MVC Edition controls, see Adding Controls.
- Create an MVC Application
- Create a Datasource for ComboBox
- Add a ComboBox control
- Build and Run the Project
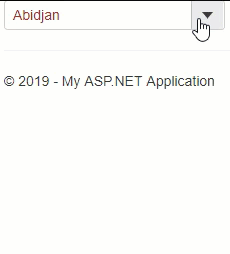
The following image shows how ComboBox appears, after completing the steps above:
Step 1: Create an MVC Application
Create a new MVC application using the ComponentOne or VisualStudio templates. For more information about creating an MVC application, see Configuring your MVC Application topic.
Step 2: Create a Datasource for ComboBox
- Add a new class to the folder Models (for example:
Cities.cs). - Add the following code to the new model to define the classes that serve as a datasource for the ComboBox control.
C# Copy Codeusing System; using System.Collections.Generic; using System.Linq; using System.Web; namespace MVCFlexGrid.Models { public class Cities { public static List<string> GetCities() { return new List<string> { "Abidjan", "Accra", "Ahmedabad", "Alexandria", "Ankara", "Atlanta", "Baghdad", "Bandung", "Bangkok", "Barcelona", "Beijing", "Belo Horizonte", "Bengaluru", "Bogota", "Boston", "Buenos Aires", "Cairo", "Calcutta", "Chengdu", "Chennai", "Chicago", "Chongqung", "Dalian", "Dallas", "Delhi", "Detroit", "Dhaka", "Dongguan", "Essen", "Fuzhou", "Guadalajara", "Guangzhou", "Hangzhou", "Harbin", "Ho Chi Minh City", "Hong Kong", "Houston", "Hyderabad", "Istanbul", "Jakarta", "Johannesburg", "Karachi", "Khartoum", "Kinshasa", "Kuala Lumpur", "Lagos", "Lahore", "Lima", "London", "Los Angeles", "Luanda", "Madrid", "Manila", "Medellin", "Mexico City", "Miami", "Milan", "Monterrey", "Moscow", "Mumbai", "Nagoya", "Nanjing", "Naples", "New York", "Osaka", "Paris", "Pheonix", "Philadelphia", "Porto Alegre", "Pune", "Qingdao", "Quanzhou", "Recife", "Rio de Janeiro", "Riyadh", "Rome", "Saint Petersburg", "Salvador", "San Francisco", "Santiago", "Sao Paulo", "Seoul", "Shanghair", "Shenyang", "Shenzhen", "Singapore", "Surabaya", "Surat", "Suzhou", "Sydney", "Taipei", "Tehran", "Tianjin", "Toronto", "Washington", "Wuhan", "Xi'an-Xianyang", "Yangoon", "Zhengzhou", "Tokyo" }; } } }
Step 3: Add a ComboBox control
Complete the following steps to initialize an AutoComplete control.
Add a new Controller
- In the Solution Explorer, right click the folder Controllers.
- From the context menu, select Add | Controller. The Add Scaffold dialog appears.
- Complete the following steps in the Add Scaffold dialog:
- Select Empty MVC Controller template.
- Set name of the controller (for example:
Default1Controller). - Click Add.
- Replace the method
Index()with the following method.C# Copy CodeViewBag.Cities = MVCFlexGrid.Models.Cities.GetCities(); return View();
Add a View for the Controller
- From the Solution Explorer, expand the folder Controllers and double click the controller
QuickStartControllerto open it. - Place the cursor inside the method
QuickStart(). - Right click and select Add View. The Add View dialog appears.
- In the Add View dialog, verify that the view name is QuickStart and View engine is Razor (CSHTML).
- Click Add. A view is added for the controller.
- Instantiate a FlexChart control in the view QuickStart as shown below.
Razor Copy Code@{ List<string> cities = ViewBag.Cities; } <div> @(Html.C1().ComboBox().Bind(cities).SelectedIndex(0)) </div>
Step 4: Build and Run the Project
- Click Build | Build Solution to build the project.
- Press F5 to run the project.
Append the folder name and view name to the generated URL (for example: http://localhost:1234/QuickStart/QuickStart) in the address bar of the browser to see the view.