In this step you will add content to the C1MultiPage control and customize its appearance. Adding content to the control is as simple as clicking in the control's body and typing text, or adding controls from the Toolbox. Complete the steps outlined in the Working with the C1MultiPage Designer Form to add three PageViews to the C1MultiPage control before completing the following.
Complete the following to add standard controls and text content to pages in the C1MultiPage control:
1. Click in the content area of the C1MultiPage control and type "This is Page 1."
The text content is added to the first page of the C1MultiPage control.
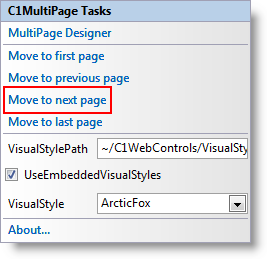
2. Click the C1MultiPage1's smart tag to open the C1MultiPage Tasks menu and select Move to next page to edit the second page.
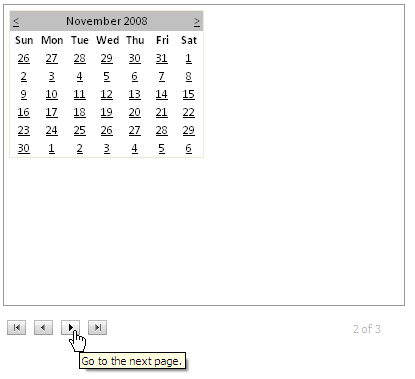
3. Navigate to the Toolbox and add a control to the second C1PageView. For example, add the standard Calendar control to the C1MultiPage control.
4. Switch to Source view to observe the structure of the C1MultiPage control, and add the following <asp:Button> tag within the <cc1:C1PageView> tag so it appears like the following:
<cc1:C1PageView ID="C1PageView03" runat="server">
<asp:Button ID="Button1" runat="server" Text="Button" />
</cc1:C1PageView>
This will add a Button control to the last page of the C1MultiPage control.
5. Run your application and note that you can navigate through the content on each PageView:
|