You can easily customize C1LightBox's appearance and behavior. In the following steps you'll set the control's behavior and appearance. The following steps assume you've completed Step 2 of 3: Adding Content to the C1LightBox Control topic.
Complete the following steps:
- In Source view, edit the <cc1:C1LightBox> tag to add AutoPlay="True" ShowTimer="True":
<cc1:C1LightBox ID="C1LightBox1" runat="server" AutoPlay="True" ShowTimer="True">The control will now cycle automatically through images and a progress bar will be displayed showing how much time is left before the image changes to the next.
-
In Source view, edit the <cc1:C1LightBox> tag to add Loop="False" SlideDirection="Vertical":
<cc1:C1LightBox ID="C1LightBox1" runat="server" AutoPlay="True" ShowTimer="True" Loop="False" SlideDirection="Vertical">The control will no longer loop through images, not returning to the first image after the last image in the series is displayed. Images will now also transition with a vertical (rather than horizontal) effect.
-
In Source view, edit the <cc1:C1LightBox> tag to add TextPosition="Outside" ControlsPosition="Outside":
<cc1:C1LightBox ID="C1LightBox1" runat="server" AutoPlay="True" ShowTimer="True" Loop="False" SlideDirection="Vertical" TextPosition="Outside" ControlsPosition="Outside">The control's navigation controls and image caption text will now be displayed outside of the image and not as an overlay.
-
In Source view, edit the <cc1:C1LightBox> tag to add KeyNav="True":
<cc1:C1LightBox ID="C1LightBox1" runat="server" AutoPlay="True" ShowTimer="True" Loop="False" SlideDirection="Vertical" TextPosition="Outside" ControlsPosition="Outside" KeyNav="True">Keyboard navigation will now be enabled in the control. At run time you will be able to move through images by pressing the arrow keys.
-
Run the application and observe that the control displays the changes that you made:
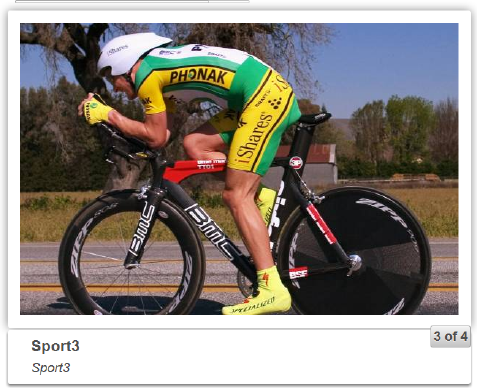
A timer progress bar is displayed above the control which changes as images are autoplayed. Text and controls are displayed outside of the image.
-
After the images complete playing, press the LEFT arrow button to navigate through the images using the keyboard.
In this step you customized the appearance and behavior of the controls. Congratulations, you've completed this quick start guide!