This topic explains how to import schema information using the C1DataObjects Conversion Wizard. Complete the following steps:
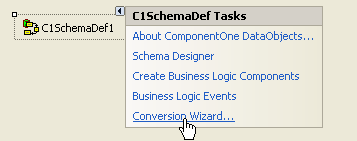
- Begin by opening the C1SchemaDef Tasks menu and selecting Conversion Wizard.
This opens the Conversion Wizard dialog box.
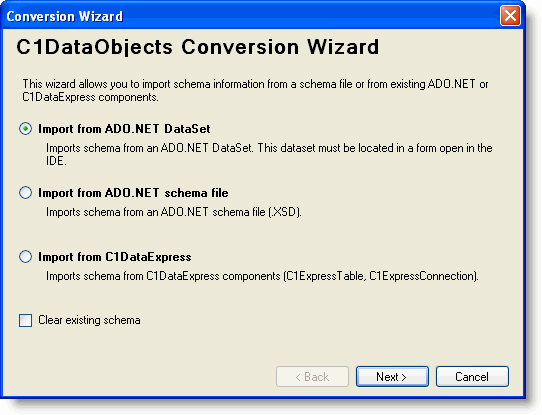
- Select the source of the schema information to be imported. The following schema sources are available:
Source Description Import from ADO.NET DataSet Imports schema from an ADO.NET DataSet. This dataset must be located in a form open in the IDE. Import from ADO.NET schema file Imports schema from an ADO.NET schema file (.XSD). Import from DataObjects for .NET Express Imports schema from DataObjects for .NET Express components (C1ExpressTable, C1ExpressConnection).
Check the Clear existing schema box if you want to delete the existing schema, and click Next to continue.
Note: There must be a Connection object in the schema for bound tables. - Select the existing dataset, schema file or component with the schema information:
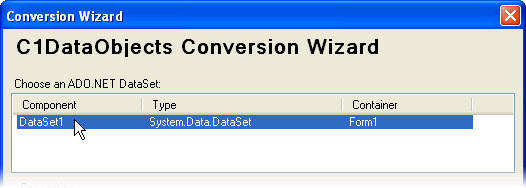
- If importing from an ADO.NET DataSet, choose an ADO.NET DataSet from the list of dataset components.
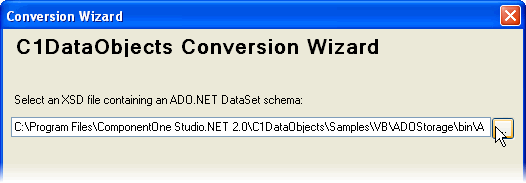
- If importing from an ADO.NET schema file, click the ellipsis button under Select an XSD file containing an ADO.NET DataSet schema to specify the schema file.
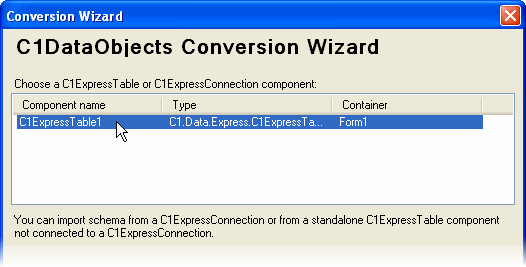
- If importing from DataObjects for .NET Express components, choose a C1ExpressConnection or C1ExpressTable component from the list of components.
Note: You can import a schema from a C1ExpressConnection or from a standalone C1ExpressTable component not connected to a C1ExpressConnection.
- If importing from an ADO.NET DataSet, choose an ADO.NET DataSet from the list of dataset components.
- Define the connection and tables to be used.
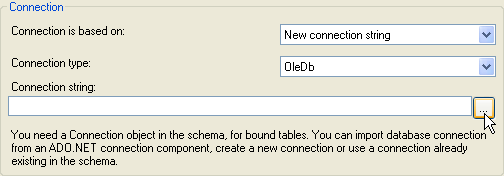
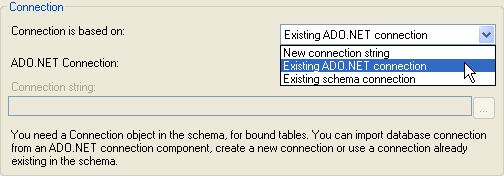
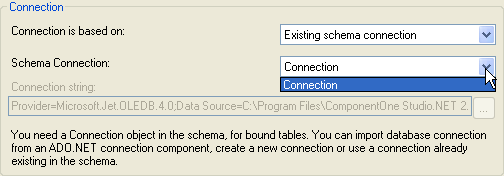
Note: The Connection section of the Conversion Wizard is the same if you are importing from an ADO.NET DataSet or schema file. If importing from an ADO.NET DataSet or schema file, follow the steps below.- In the first drop-down box, specify whether the Connection is based on: a new connection string, an existing ADO.NET connection or an existing schema connection.
- If you select New connection string, specify the Connection type in the next drop-down box and click the ellipsis button next to Connection string to enter the database connection.
- If you select Existing ADO.NET connection, specify the ADO.NET Connection in the next drop-down box. The connection string is automatically added to the Connection string box.
- If you select Existing schema connection, select a Schema Connection from the next drop-down box. The connection string is automatically added to the Connection string box.
- If you select New connection string, specify the Connection type in the next drop-down box and click the ellipsis button next to Connection string to enter the database connection.
- Click Next to continue.
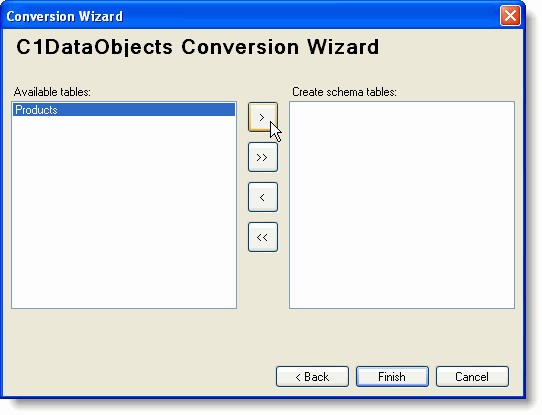
- Select tables from the list of Available tables in the database, and click the arrows to move the tables to the Create schema tables box.
Note: If you are importing from DataObjects for .NET Express components, select Import connection from the selected C1DataExpress component or choose one of the other existing connections from the Connection drop-down box.

- In the first drop-down box, specify whether the Connection is based on: a new connection string, an existing ADO.NET connection or an existing schema connection.
- Click Finish. The final window in the wizard shows the schema objects that have been created. Expand the nodes to see all objects.
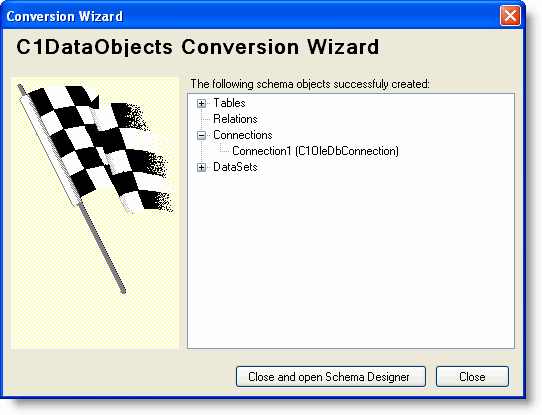
- Click Close and open Schema Designer to complete the wizard.