After importing database structure to a schema, the database usually changes with time as the development process progresses. As a result, the schema may be no longer in sync with the database structure. Such discrepancies cause problems at run time and they are hard to keep track of manually. Special Schema Designer menu items and other features can help you keep the schema in sync with the database.
The schema comparison/differences tool scans the schema and database structure and shows differences between them in the Output window. To use this tool, complete the following steps:
- Select Compare schema with database structure from the Schema menu. The Compare schema with database structure window appears.

- Select the checkbox next to Compare tables and fields to include tables and fields in the comparison. You can also check which types of objects to import from the database: tables, views, aliases.
- Select the checkbox next to Compare relations to include relations in the comparison.
- Select the database connection from the drop-down box next to Connection.
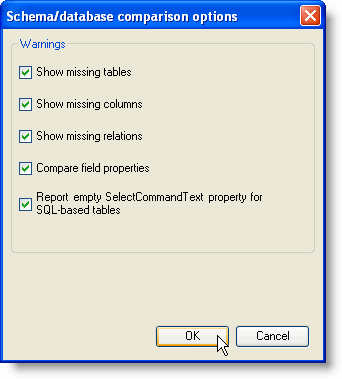
- Click the Options button to select the warnings to be displayed in the Output window once the comparison has been completed.
- Click OK to close the Options window and click OK again in the Compare schema with database structure window to begin the comparison. The results appear in the Output window.
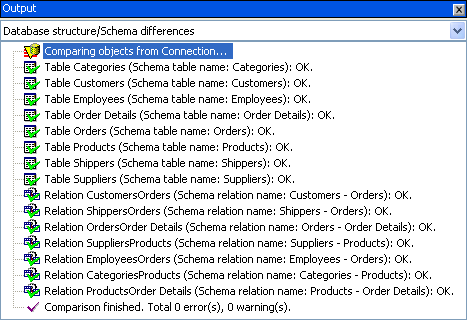
Contents of the Output window can be copied to the clipboard using the window's context menu. The tool shows only differences for objects and properties that can be imported from the database structure. In effect, the tool compares two schemas: one is the existing schema, and the other is the schema that would result from the import of the database structure if such import would be performed from scratch at the time of comparison. Only tables, fields and relations belonging to the selected connection are processed; therefore, unbound (calculated) fields are ignored, as are unbound tables, or tables and relations bound to other connections.
The additional import tool, Add absent database objects in the Schema menu, allows you to import additional fields or whole tables and additional relations that could be added to the database after the schema was created from the database structure. This tool does not change any properties of the objects that are already in the schema, so you can safely use it to add new tables, fields and relations as they are added to the database. To use the Add absent database objects tool, complete the following:
- Select Add absent database objects from the Schema menu. The Add absent database objects window appears.
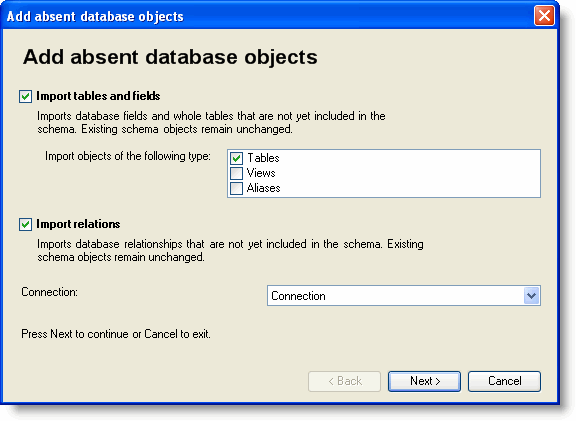
- Select the checkbox next to Import tables and fields to import the ones not already in the schema. You can also check which types of objects to import from the database: tables, views, aliases.
- Select the checkbox next to Import relations to include relations not already in the schema.
- Select the database connection from the drop-down box next to Connection and click Next to continue. The next Add absent database objects window appears.
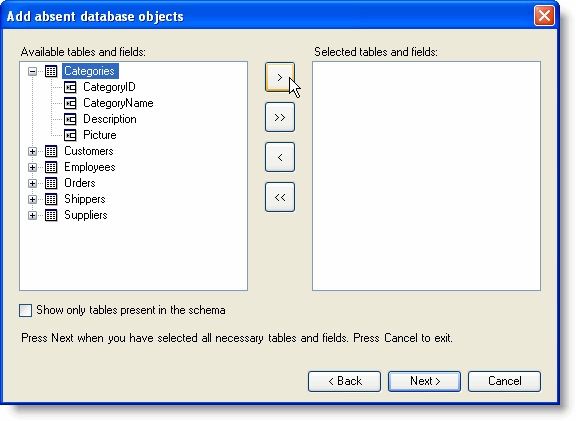
- Select the desired objects from the Available tables and fields window and use the arrows to move them to the Selected tables and fields window. You can click the node next to the tables to view the list of fields in each table.
Note: Clicking the Show only tables present in the schema checkbox displays only the tables already in the schema in the Available tables and fields window. - Click Next and use the arrows to move the desired relations from the Available Relations window to the Selected relations window.
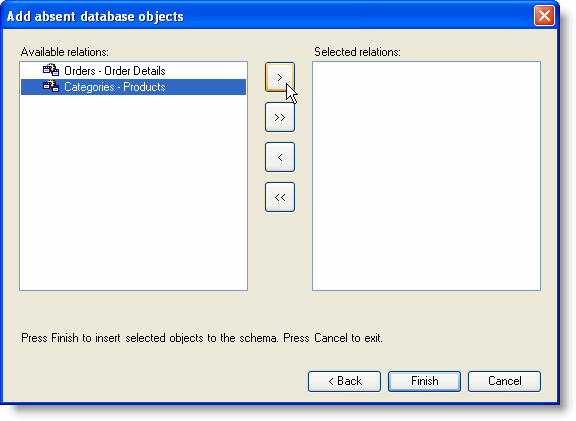
- Click Finish. The Schema Designer appears with the specified tables, views, and aliases.
Finally, there is a Retrieve Fields button in the simple table editor in the toolbar at the top of the Fields panel. It performs two functions that can be selected in a pop-up menu at the right edge of the button: Retrieve all fields (default) and Add absent fields.
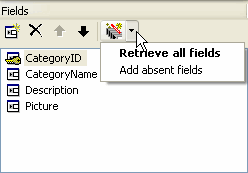
The Retrieve all fields action deletes all existing fields and retrieves fields from database structure. There is a confirmation dialog that warns you that this action will delete all existing fields with all their settings. The second action, Add absent fields, does not change the existing fields or their properties in any way. It adds the fields that exist in the database table but do not exist in the schema table. Usually those are fields that were added to the table after the schema was created.