In this section of the quick start, you'll learn how to bind C1Menu to a SiteMapDataSource.
To create an XML file and bind it to C1Menu, add the XMLDataSource component to the Web site, and then assign it to the C1Menu control.
- Start a new AJAX 1.0-Enabled ASP.NET 2.0 Web Site project.
- Right-click on the App_Data in the Solution Explorer and select Add New Item. The Add New Item dialog box appears.
- Select the XML File and rename it "Menu.xml".
- Click on the Add button in the Add New Item dialog box.
- Switch to the XML view and add the following data to Menu.xml:
To write code in Source View
<root>

              <menuitem Text="Home">

              </menuitem>

              <menuitem Text="Products">

                <menuitem Text="Hardware">

                </menuitem>

                <menuitem Text="Software">

                </menuitem>

              </menuitem>

              <menuitem Text="Services">

                <menuitem Text="Training">

                </menuitem>

                <menuitem Text="Consulting">

              </menuitem>

</root> - Switch back to the .aspx page and select the Design tab to switch to the design view.
- Expand the Data node in the Visual Studio Toolbox and double-click on the XmlDataSource component to add it to the Web page.
- Select the XmlDataSource1 on the Web Page and navigate to the Properties window.
- Click on the ellipsis button next to the DataFile property to open the Select XML File dialog box. Select App_Data and click Menu.xml file. Click OK to add it to the XmlDataSource1.DataFile property.
- Set the XmlDataSource1.Xpath property to root/menuitem.
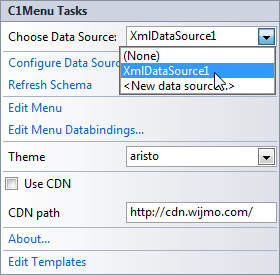
- Click the smart tag to open the C1Menu Tasks menu and select XmlDataSource1 from the Choose Data Source drop-down listbox
In the next step, you'll run the program and observe how the XML file populates the menu.