If you are using ComponentOne controls with Visual Studio 2017 or above, you can use the GrapeCity ComponentOneMenu Extension to License applications, open Sample Explorer, update projects and contact Technical Support. After installation, it gets available with various options as shown below.
GrapeCity License Manager Extension for Visual Studio
To use GrapeCity License Manager Extension, follow these steps:
- From the Tools menu, select GrapeCity. You will see four options as shown in the image below.
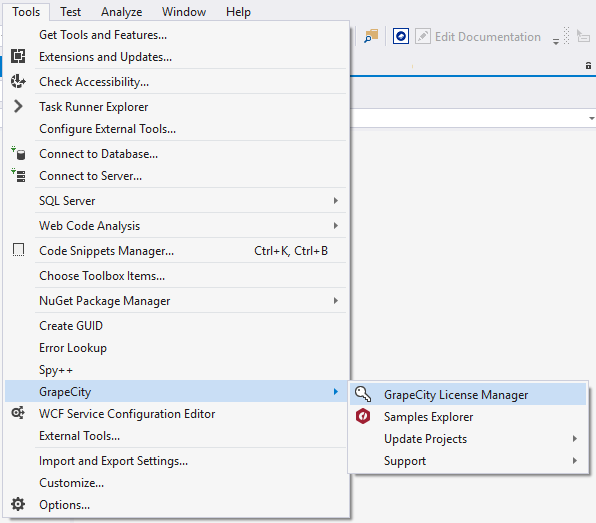
-
Select GrapeCity License Manager. The License Manager window appears as shown in the image below:
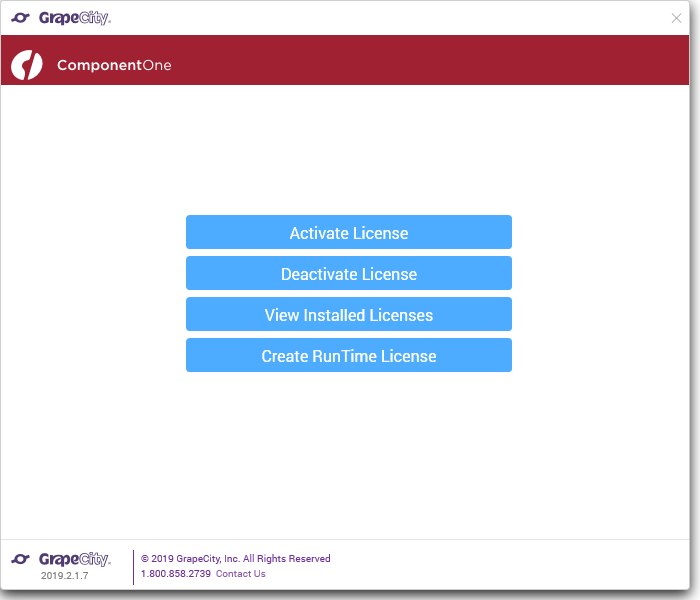
The GrapeCity License Manager displays the following options:
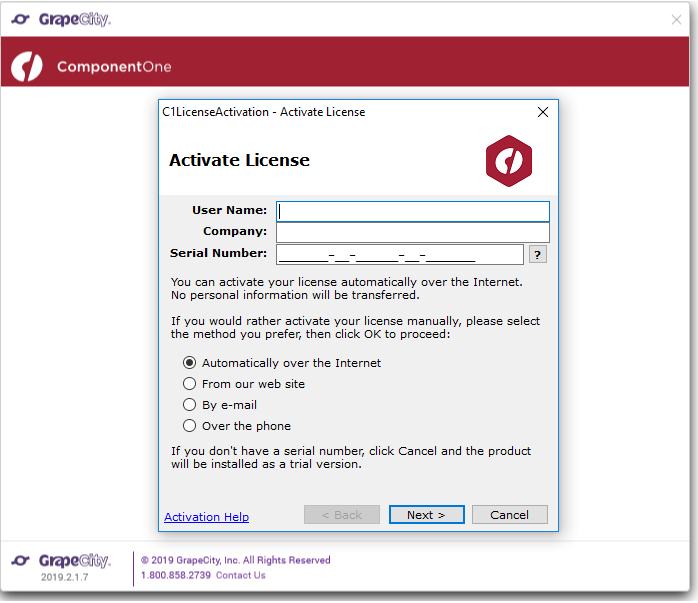
- Activate License - It allows the users to activate the License (Serial Number) using the Internet, ComponentOne website, e-mail, or over phone. On clicking this option, C1LicenseActivation - Activate License application window appears as shown below. Users can follow the wizard to do the license activation.
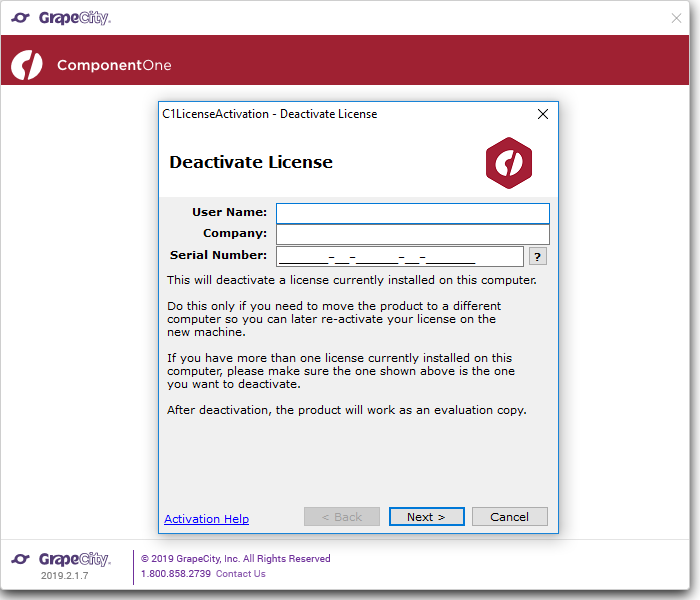
- Deactivate License – It allows the users to deactivate the License (Serial Number) using the Internet, ComponentOne website, e-mail, or over phone. On clicking this option, C1LicenseActivation - Deactivate License application will appear as shown below. Users can follow the wizard to do the license deactivation.
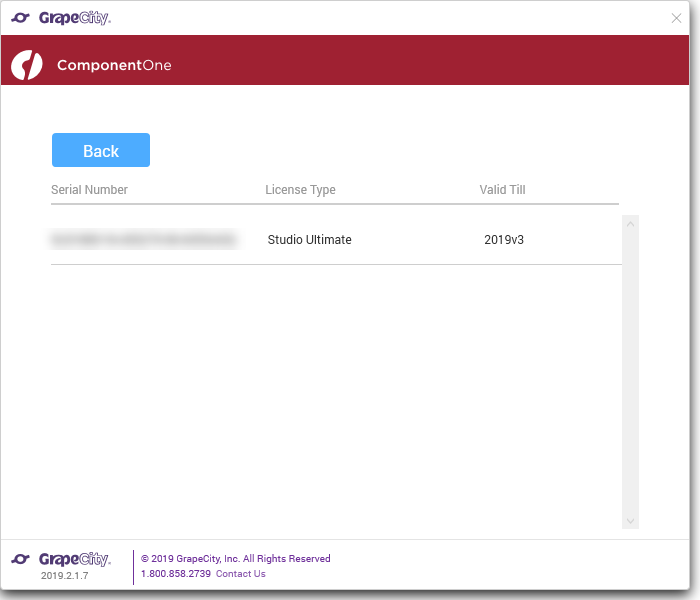
- View Installed Licenses - It allows the users to view the Serial Number, License Type, and Validity of the installed licenses on the system. The license can be viewed as shown below:
- Create RunTime License - It allows the users to generate runtime license for the project(s). On clicking this option, the following window appears:
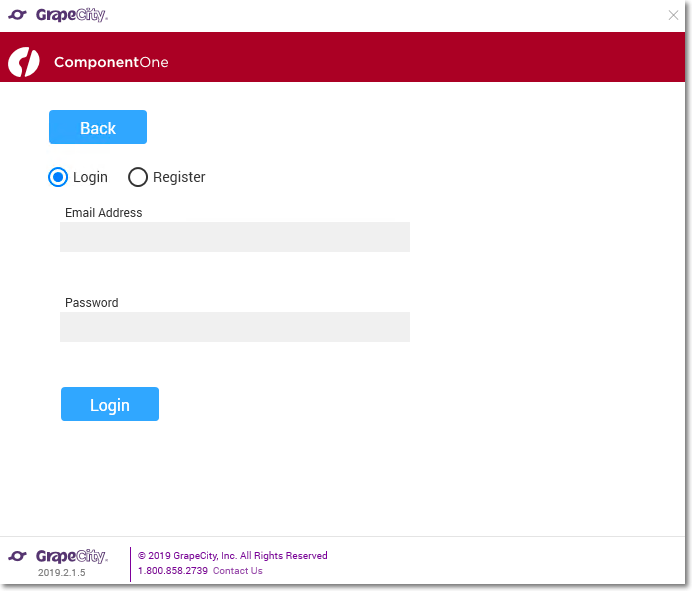
To use this option, you need to login the GrapeCity Account. In case you don't have a GrapeCity Account, you can create it using the Register option. Once you Sign in, the following window appears: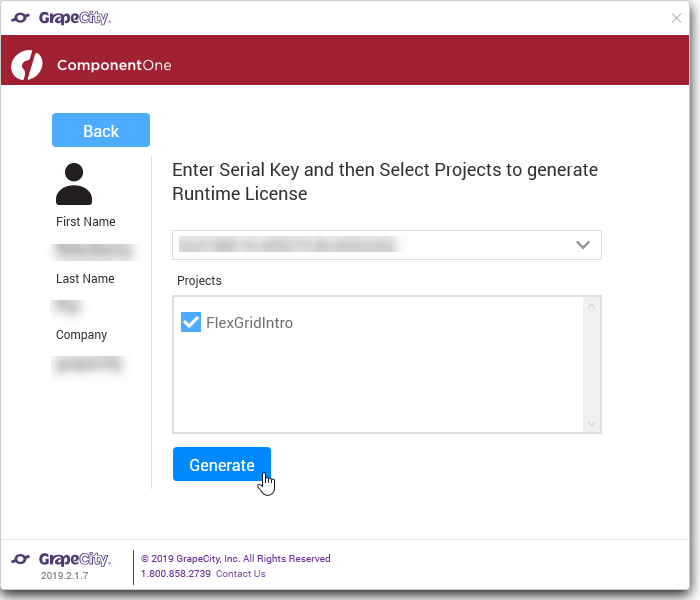
From the above window, you can select the license and the project for which license needs to be generated. On clicking the Generate button, a success message appears and a license file GCDTLicenses.xml is generated.
- Activate License - It allows the users to activate the License (Serial Number) using the Internet, ComponentOne website, e-mail, or over phone. On clicking this option, C1LicenseActivation - Activate License application window appears as shown below. Users can follow the wizard to do the license activation.
Samples Explorer
To view sample explorer, follow these steps:
- From the Tools menu, select GrapeCity.
- Select Samples Explorer. ComponentOne Samples Explorer window appears as shown in the image below:
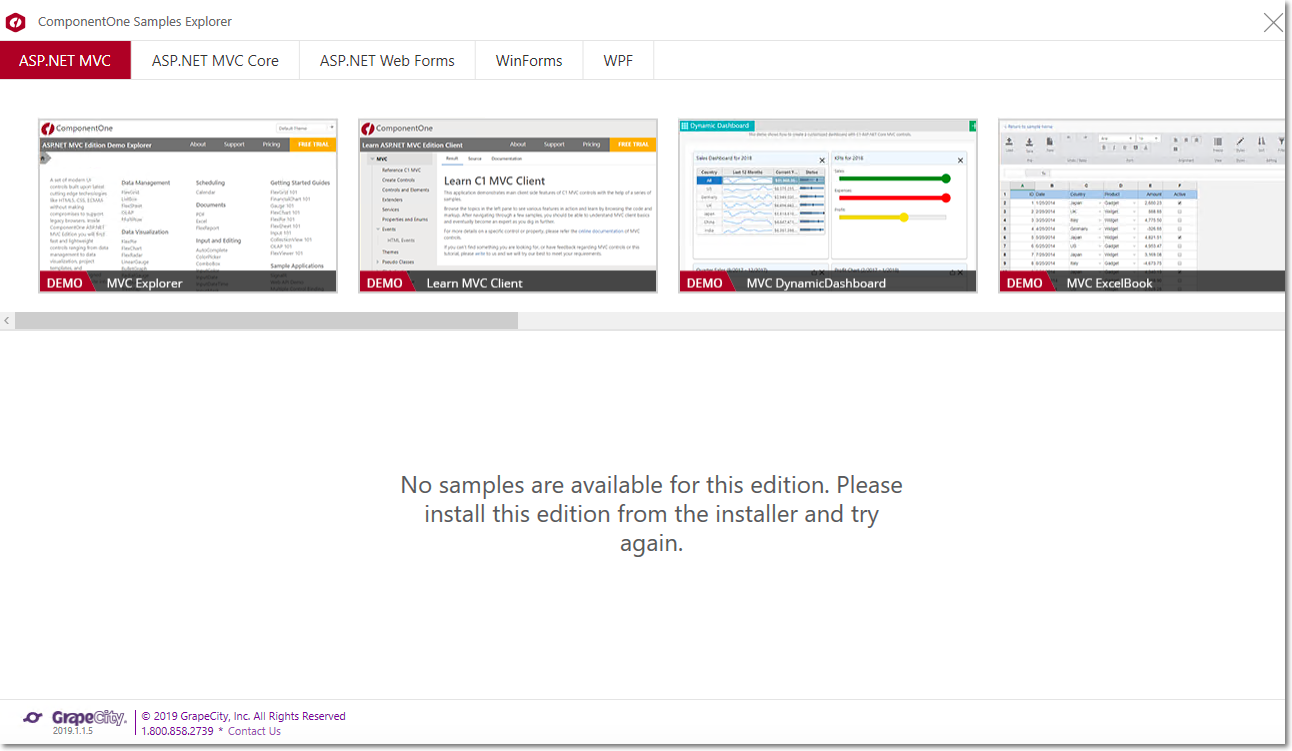
This option allows the users to open the Sample Explorer that has been installed on the system with the installer. From the displayed window, you can open any of the required samples or demos.
Update Projects
To update existing projects, follow these steps:
- From the Tools menu, select GrapeCity.
- Select Update Projects. Update Projects provides two options to update the project(s) as shown and listed below:
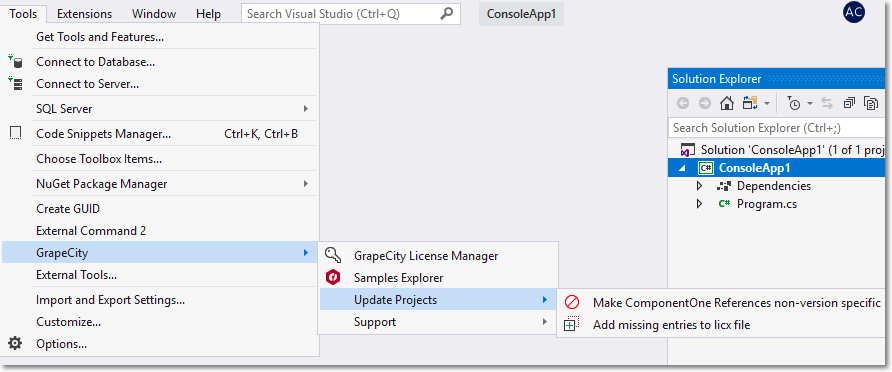
- Make ComponentOne References non-version specific - This option removes the version information from the Licenses.licx file and sets the Specific Version property of ComponentOne assemblies in the project(s) to false. On clicking this option, a window appears where you can select the Project, click Update, and click Finish to complete the update process.
- Adding missing entries to Licx file - This option adds missing license information to the license file (*. licx) in the project(s). On Clicking, a window appears where you can select the Project, click Update, and click Finish to update the license files.
- Make ComponentOne References non-version specific - This option removes the version information from the Licenses.licx file and sets the Specific Version property of ComponentOne assemblies in the project(s) to false. On clicking this option, a window appears where you can select the Project, click Update, and click Finish to complete the update process.
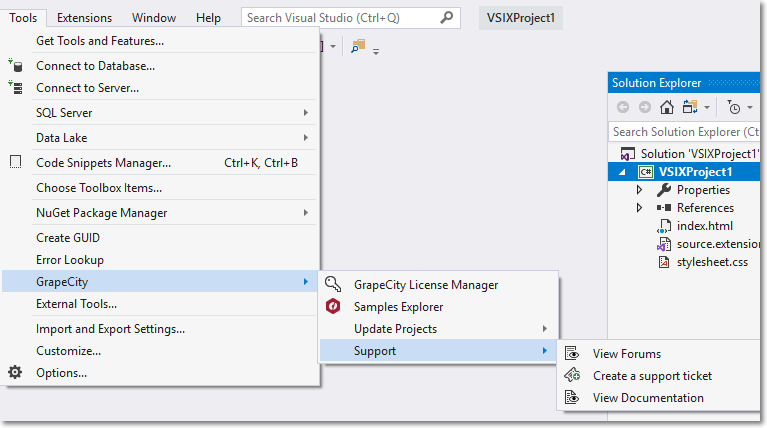
Support
To contact the Technical Support and view Documentation, follow these steps:
- From the Tools menu, select GrapeCity.
- Select Support. Support provides three options as shown and listed below.
-
View Forums - This option opens the window shown below, which has the redirecting links to the GrapeCity ComponentOne Forums.
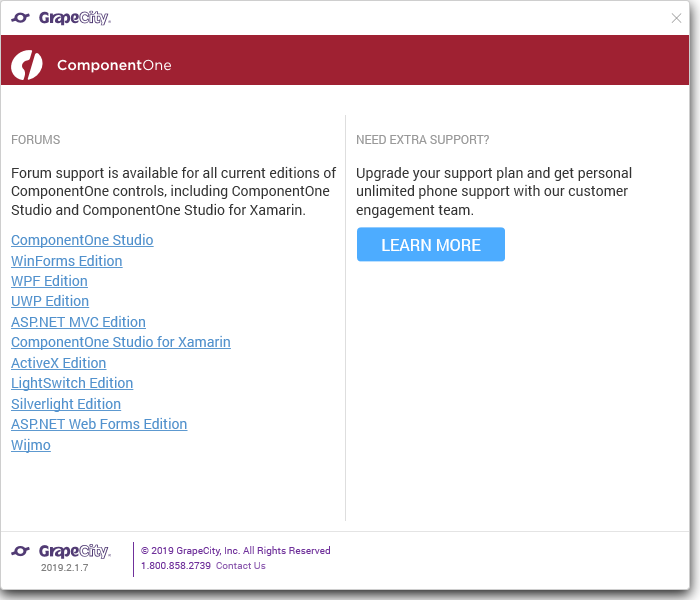
You can login to access the community forums for all GrapeCity products and post queries/doubts related to the products. You can also find information on how to contact the support team by clicking Learn More. -
Create a support ticket - This option redirects you to the Support Portal where you can login and get in touch with the support team directly. You can also post queries/doubts related to the products to get personalized support.
-
View Documentation - This option redirects you to the Documentation page where you can access all the documents related to all the GrapeCity products.
-