You can use the VisualStyle, VisualStylePath, and UseEmbeddedVisualStyles properties to create a custom visual style for your C1ToolTip. For more information on custom visual styles, see Custom Visual Styles.
To add a custom visual style, best practice is to copy one of the existing visual styles and customize it. In this example we will use the C1ToolTip ArcticFox style.
Adding Custom Visual Styles in Design View
To add a custom visual style, complete the following steps:
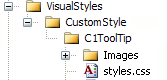
1. Copy the theme folder C:\Program Files\ComponentOne\Studio for ASP.NET\C1WebUI\VisualStyles\ArcticFox\C1ToolTip to a new folder in your Visual Studio project so the folder structure is: ~\VisualStyles\CustomStyle\C1ToolTip.
2. Open the styles.css file in the ~/VisualStyles/CustomStyle/C1ToolTip folder and replace any instance of "ArcticFox" with "CustomStyle". You can modify the CSS definition to customize the appearance.
3. Locate the first instance of .C1ToolTip_CustomStyle and add a font-size and font-family attribute so it looks like the following:
.C1ToolTip_CustomStyle
{
clear: none;
font-size: small;
font-family: Arial, Verdana;
}
4. Save and close the styles.css file.
5. Add a button control and C1ToolTip control to your page.
6. Click the C1ToolTip smart tag
(![]() ) and select
Edit TargetControls in the C1ToolTip Tasks menu. The C1ToolTip
Designer Form opens.
) and select
Edit TargetControls in the C1ToolTip Tasks menu. The C1ToolTip
Designer Form opens.
7. Select C1ToolTip1 on the Edit tab.
8. In the properties pane, next to the Text property, enter "This is my tooltip."
9. Click the Add Child Item button on the toolbar and select the C1ToolTipTargetControl1 item in the tree.
10. In the properties pane, enter Button1 next to the C1ToolTip.TargetControlID property.
11. Click OK to close the C1ToolTip Designer Form.
12. Select the C1ToolTip control on your form and click the smart tag to open the C1ToolTip Tasks menu again.
a. Uncheck the UseEmbeddedVisualStyles property to set it to False.
b. Make sure the VisualStylePath property is set to ~/VisualStyles.
c. Select CustomVisualStyle (external) from the VisualStyle property drop-down list.
13. Press F5 to run your project, move the mouse over the button, and notice the C1ToolTip text is small and in Arial font.
Adding Custom Visual Styles in Source View
To add a custom visual style in Source view, complete the following steps:
1. Complete steps 1 through 4 under Adding Custom Visual Styles in Design View.
2. Enter Source view and enter VisualStyle="CustomStyle", VisualStylePath="~/VisualStyles", and UseEmbeddedVisualStyles="False" into the <cc1:C1ToolTip> tag. Your XHTML will resemble the following:
<cc1:C1ToolTip ID="C1ToolTip1" runat="server" Height="22px"
VisualStyle="CustomStyle" VisualStylePath="~/VisualStyles" UseEmbeddedVisualStyles="False" Width="155px" />
Adding Custom Visual Styles in Code
To add a custom visual style, complete the following steps:
1. Complete steps 1 through 4 under Adding Custom Visual Styles in Design View.
2. Double-click the Web project to place a Page_Load event in the code editor.
3. Set the UseEmbeddedVisualStyles property to False by adding the following code to the Page_Load event:
C1ToolTip1.UseEmbeddedVisualStyles = False
C#
C1ToolTip1.UseEmbeddedVisualStyles = false;
4. Change the VisualStylePath property:
C1ToolTip1.VisualStylePath = "~/VisualStyles"
C#
C1ToolTip1.VisualStylePath = "~/VisualStyles";
5. Select the custom visual style:
C1ToolTip1.VisualStyle = "CustomStyle"
C#
C1ToolTip1.VisualStyle = "CustomStyle";
6. Run the program and observe that the C1ToolTip control has adopted your custom visual style.
|