You can change the direction that the C1Expander expands and collapses and the location of the C1Expander's header by setting the ExpandDirection property. By default the ExpandDirection of the control is set to Bottom and the header appears at the top of the control (the control expands out from the header location, so expands to the bottom). For more information, see the Expand Direction topic. In this topic you'll create radio buttons that can be selected at run time to change the control's ExpandDirection.
To set the control's ExpandDirection property at run time, create a new AJAX-Enabled Web site project and complete the following steps:
1. In Design View, navigate to the Visual Studio Toolbox and double-click the C1Expander icon to add the control to your page.
2. Click on the Source tab to switch to Source view, and note that the body of the page looks similar to the following:
<body>
<form id="form1" runat="server">
<div>
<asp:ScriptManager ID="ScriptManager1" runat="server">
</asp:ScriptManager>
<cc1:C1Expander ID="C1Expander1" runat="server" HeaderSize="25px" Height="200px" Width="100px"><Header>Header</Header><Content>Content</Content></cc1:C1Expander>
</div>
</form>
</body>
3. In the <cc1:C1Expander> tag, change Height="200px" Width="100px" to Height="300px" Width="300px" so the tag appears similar to the following:
<cc1:C1Expander ID="C1Expander1" runat="server" HeaderSize="25px" Height="300px" Width="300px"><Header>Header</Header><Content>Content</Content></cc1:C1Expander>
This will resize the C1Expander control.
4. Add the following content just below the </cc1:C1Expander> tag to add four radio buttons that will set the ExpandDirection property.
<p>Select an Expand Direction:</p>
<div style="clear:none;float:left;width:100px;">
<input type="radio" name="ExpandDirectionGroup" id="RadioButton_ExpandDirection_Top" onclick="C1ExpanderSampleOptionSelected(this)" />
<label for="RadioButton_ExpandDirection_Top">Top</label>
</div>
<div style="clear:none;float:left;width:100px;">
<input type="radio" name="ExpandDirectionGroup" id="RadioButton_ExpandDirection_Right" onclick="C1ExpanderSampleOptionSelected(this)" />
<label for="RadioButton_ExpandDirection_Right">Right</label>
</div>
<div style="clear:none;float:left;width:100px;">
<input checked="checked" type="radio" name="ExpandDirectionGroup" id="RadioButton_ExpandDirection_Bottom" onclick="C1ExpanderSampleOptionSelected(this)" />
<label for="RadioButton_ExpandDirection_Bottom">Bottom</label>
</div>
<div style="clear:none;float:left;width:100px;">
<input type="radio" name="ExpandDirectionGroup" id="RadioButton_ExpandDirection_Left" onclick="C1ExpanderSampleOptionSelected(this)" />
<label for="RadioButton_ExpandDirection_Left">Left</label>
</div>
5. At the top of the page, add the following JavaScript just above the opening <html> tag:
<script language="javascript" type="text/javascript">
function C1ExpanderSampleOptionSelected(optionElem) {
var oExpander = Sys.Application.findComponent("<%=C1Expander1.ClientID%>");
var s = optionElem.id;
switch(s){
case "RadioButton_ExpandDirection_Top":
oExpander.set_expandDirection(C1.Web.UI.Controls.C1Expander.C1ExpandDirection.top);
break;
case "RadioButton_ExpandDirection_Right":
oExpander.set_expandDirection(C1.Web.UI.Controls.C1Expander.C1ExpandDirection.right);
break;
case "RadioButton_ExpandDirection_Bottom":
oExpander.set_expandDirection(C1.Web.UI.Controls.C1Expander.C1ExpandDirection.bottom);
break;
case "RadioButton_ExpandDirection_Left":
oExpander.set_expandDirection(C1.Web.UI.Controls.C1Expander.C1ExpandDirection.left);
break;
}
}
</script>
This function will change the C1Expander's ExpandDirection property when a radio button on the page is clicked.
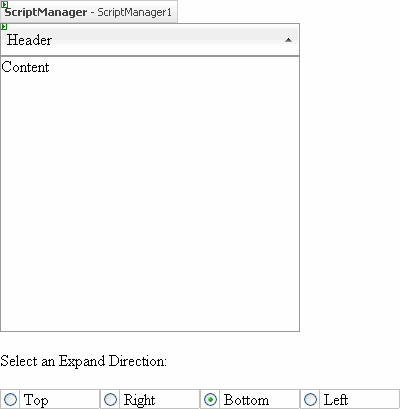
6. Switch to Design view and note that the page now looks similar to the following:
Run the project and observe:
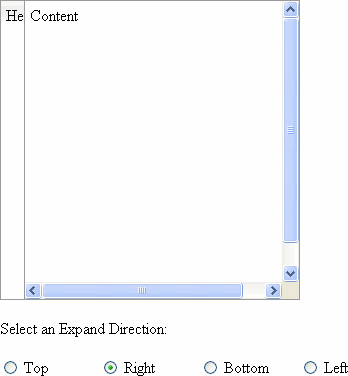
1. Click the Right radio button.
The expand direction of the control will change, and it will appear similar to the following:
2. Click the control's header to collapse the control.
3. Click a different radio button; the expand direction of the control will change again.
4. Click the control's header to view the direction in which the control expands.
|
