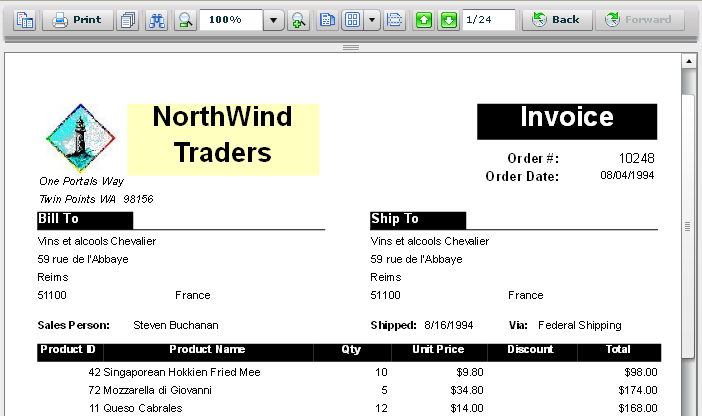
The new FlashViewer is interactive and customizable.
This walkthrough is split up into the following activities:
- Creating an ASP.NET Web site using ActiveReports
- Adding the ActiveReports WebViewer control to the aspx page
- Setting up the FlashViewer
 |
Caution: The WebViewer does not support the use of Ole Objects. |
To complete the walkthrough, you must have access to Internet Information Services either from your computer or from the server to Configure the HTTPHandlers.
When you have completed this walkthrough, you will have a Web site that looks similar to the following.

To create an ASP.NET Web site with ActiveReports
- From the Visual Studio File menu, select New Web Site... (From the Visual Studio 2010 File menu, select New, then Web Site...).
- In the New Web Site dialog that appears, select ASP.NET Web Site. (In the Visual Studio 2010 New Web Site dialog that appears, select ASP.NET Empty Web Site).
- Rename the website and click the OK button.
- (For Visual Studio 2010 only) From the Visual Studio 2010 Website menu, select Add New Item.
- (For Visual Studio 2010 only) Select Web Form and click Add.
- From the Website menu, select Add New Item.
- Select ActiveReports 6 (code-based) File, rename it, and click Add.
- In the Microsoft Visual Studio message box that appears, click Yes to place the report inside the App_Code folder so that it is generally consumable in your site. The code view of the report appears.
- In the Solution Explorer, expand the App_Code folder, right-click your report and select View Designer. This displays the design surface where you can add controls to the report and set its properties.

Tip: For help with this, see the Create Common Reports topics.
To add the WebViewer control to the aspx page
- On the Default.aspx page, click the Design tab at the bottom.
- From the Toolbox, drag the WebViewer control onto the page.

Tip: If you get a Could not load file or assembly... message, an old version of ActiveReports was installed when the WebViewer was last added to the toolbox. To add the latest version of the control, right-click the toolbox and select Choose Items. In the Choose Toolbox Items dialog, clear the old WebViewer check box and select the WebViewer check box with the highest version number. - Drag the bottom right corner of the control to enlarge the viewer to at least 740 px wide and 1000 px high to avoid horizontal and vertical scrollbars at run time.
- In the Properties window, drop down the ReportName property and select your report.
- Drop down the ViewerType property, and select FlashViewer.
To set up the FlashViewer
- In Windows Explorer, navigate to C:\Program Files\GrapeCity\ActiveReports 6\Deployment\Flash (on a 64-bit Windows operating system, navigate to C:\Program Files (x86)\GrapeCity\ActiveReports 6\Deployment\Flash).
- In the Flash folder, copy the ActiveReports.FlashViewer.swf file and the Themes folder.

The ActiveReports.FlashViewer.Resources.swf file is only used for localization. - Paste the swf file and Themes folder into your main project folder.
- Back in Visual Studio, in the Solution Explorer, click the
 Refresh button to see the swf file and Themes folder.
- Click the WebViewer so that it is selected in the Properties window.
- Expand the FlashViewerOptions property node, and click the ThemeUrl property to show the ellipsis button.

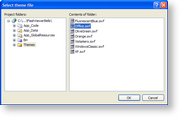
- Click the ellipsis button to open the Select theme file dialog.

- In the Project folders pane to the left, select the Themes folder. The included themes display in the Contents of folder pane to the right.
- Select a theme and click OK.
- Run the project to view the results.
See Also