In a Page report, the OverflowPlaceHolder control is a rectangular placeholder for data that does not fit inside the fixed size of a List, BandedList, Tablix or Table data region. When you link a data region to an OverflowPlaceHolder, this control gets its Size property values from the FixedSize of the data region it is linked with.
You can also place multiple OverflowPlaceHolder controls in a report to create different looks for your data output. Link a data region to an OverflowPlaceHolder control and then link that OverflowPlaceHolder control to another OverflowPlaceHolder control. Two common layouts that you can create through this process are:
-
Multiple Page Layout: Place the data region on the first page of the report and OverflowPlaceHolder controls on subsequent pages to create a layout with overflow data on multiple pages.
Note: If a page contains only an OverflowPlaceHolder with no data to display, the empty page does not render. However, if the page also contains any control with static data, the page renders. To skip rendering the page, set GrapeCity.ActiveReports.PageReportModel.Page.ThrowIfPlaceHoldersEmpty property to True.
- Columnar Report Layout: Place the data region and the OverflowPlaceHolder on the same page of the report to create a layout that displays data in a columnar format like the one in the following image.

Data overflow to an OverflowPlaceHolder
You can bind overflow data from a data region to an OverflowPlaceHolder control or from an OverflowPlaceHolder control to another OverflowPlaceHolder control in a report. The following steps take you through the process:
These steps assume that you have already added a Page Report template to your project, connected it to a data source and added a DataSet. See Connect to a Data Source and Add a Dataset for more information.
To link a data region to an OverflowPlaceHolder control
When your data goes beyond the fixed size of a data region, you can create a link from the data region to enable flow of data into the OverflowPlaceHolder.
- From the Visual Studio toolbox, on the Page1 tab of the report, drag and drop a data region like List onto the design surface and set its FixedSize property.
- If the data goes beyond the fixed size of the data region, from the Visual Studio toolbox, on Page2 tab of the report, drag and drop an OverflowPlaceHolder control (OverflowPlaceHolder1 by default) onto the design surface.
- On the Page1 design surface, select the data region placed above and go to the Properties Window.
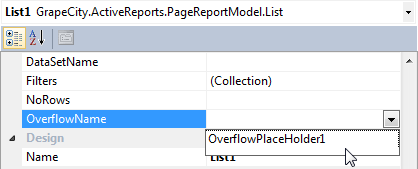
- In the Properties Window, go to the GrapeCity.ActiveReports.PageReportModel.DataRegion.OverflowName property and from the dropdown list, select the name of the OverflowPlaceHolder control you added earlier.
The following image shows the Properties Window of a List data region (List1) where OverflowPlaceHolder1 is set in the OverflowName property.
Tip: Depending on your layout requirements, you can place the OverflowPlaceHolder control on the same page tab as the data region or a different page tab.
To link an OverflowPlaceHolder control to another OverflowPlaceHolder control
You can place additional OverflowPlaceHolder controls, to display data that flows beyond the first OverflowPlaceHolder control.
- From the Visual Studio toolbox, drag and drop another OverflowPlaceHolder control like OverflowPlaceHolder2 onto the design surface.
- In the Designer, select the OverflowPlaceHolder1 control that contains overflow data and go to the properties window.
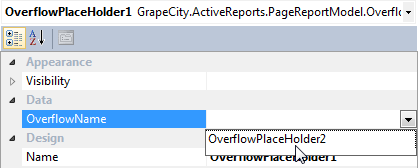
- In the Properties Window, go to OverflowName property and select the name of the new OverflowPlaceHolder control you placed above. For e.g., in OverflowPlaceHolder1, set the OverflowName property to OverflowPlaceHolder2.
The following image shows the Properties Window of OverflowPlaceHolder1 where the OverflowPlaceHolder2 is set in the OverflowName property.
Caution: In a report with multiple OverflowPlaceHolder controls, link the OverflowPlaceHolder controls to their respective data regions and other OverflowPlaceHolder controls such that the overflow chain does not break.
See Also