ActiveReports Server provides you with the ability to upload, download or delete images from the Administrator dashboard. You can provide access to images uploaded on ActiveReports Server to all of your developers who design reports in ActiveReports. For more information, see Working with Images in the ActiveReports help.
Managing Images
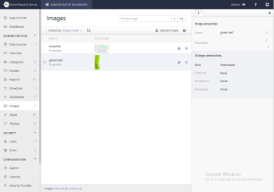
You can perform the following operations from the Images page on the Administrator dashboard.
Download
- In the Administration section of the Administrator Dashboard, click Images.
- On the Images page, click the Download image button.
The image file is downloaded on your system.
Upload
- In the Administration section of the Administrator Dashboard, click Images.
- On the Images page, click the Upload image button.
- In the Upload an existing image dialog that appears, you can either drop an image file or click inside the dotted box to browse to an image file.
- In the Open dialog that appears, navigate to the image file that you want to upload and click Open. The dialog closes and the file name appears in the dotted box.
- Click Upload to add the image to the server.
Delete
- On the Images page, click the Delete image button next to the image. The image is removed from the list.
Rename
- On the Images page, select an image from the list, and then click the image properties button to display the image properties.
- In the Name box, enter the name to update.
Manage Permissions
- On the Images page of the Administrator Dashboard, select an image from the list, and then click the image properties button to display the properties.
- In the Change permissions section, next to each role, drop down the box to select whether to allow its users Read, Read & Modify or None to hide the image from users in that role.
Note: Users require Read permission to access the images in ActiveReports.