The Report Wizard sample demonstrates how to create and customize a report, using the report wizard.
Sample Location
Visual Basic.NET
<User Folder>\GrapeCity Samples\ActiveReports 12\Page Reports And RDL Reports\API\ReportWizard\VB.NET
C#
<User Folder>\GrapeCity Samples\ActiveReports 12\Page Reports And RDL Reports\API\ReportWizard\C#
Run-Time Features
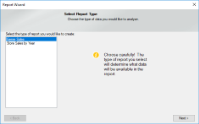
When you run this sample, the form with the Report Wizard appears. On the Select Report Type page, select the report type you want to analyze and click the Next button.
On the next Choose grouping options page of the wizard that appears, you are asked to choose a field for grouping the report data and click the Next button. You can also enable the checkbox at the bottom of the page if you like to include the last detail of the report as separate group. If you leave it unchecked, the checkbox automatically adds the last detail to a previous group.
On the next Select output fields page of the wizard that appears, you are asked to choose the fields you want to display in your report and click the Next button.
On the next Summarization and Review page, you can review the settings you have selected previously. You can also set the summary options if you want to display a grand total or a sub-total in the report.
Finally, when you click the Finish button, the GrapeCity Unified ReportDesigner appears and displays the report.
Project Details
MetaData folder
This folder contains two internal classes, FieldMetaData and ReportMetaData. The FieldMetaData class contains information on the fields used in the report string values. This file provides this information when required by the application.
Similarly, the ReportMetaData class contains information on the reports used in this sample. This file provides this information when required by the application.
Resources folder
This folder contains images and icons used by the Report Wizard API.
UI folder
WizardSteps
This folder contains templates of the Report Wizard pages, which get displayed inside the Panel control on the WizardForm at run time.
DesignerForm
This form appears when you click the Finish button on the last page of the Report Wizard. This form uses the ToolStripPanel, ToolStripContentPanel, Designer, Toolbox, ReportExplorer and a PropertyGrid controls to create the Unified ReportDesigner.
Right-click the form and select View Code to see how to set the designer and create a blank page report. It also contains code that attaches the Toolbox, ReportExplorer and PropertyGrid controls to the Designer, inserts DropDown items to the ToolStripDropDownItem, sets their functions, and checks for any modifications that have been made to the report in the designer.
DragDropListBox
This file contains code to override methods that enable and handle the drag-and-drop feature in the ListBox, which appears on the wizard page where you select the grouping and the output fields. Thus, instead of selecting a field and clicking the Add button in the ListBox control, you can directly drag fields as well.
TipControl
This file contains the design of the Tip that appears on the first page of the report wizard.
WizardDialog
This is the main form that appears when you run the sample. It uses the PictureBox, two Labels, Panel and two Button controls to create the Report Wizard. The PictureBox displays the logo while the two Label controls display the Page Title and Page Description respectively. The Panel control loads the design of different pages of the Report Wizard. The two Button controls handle the last page and next page functions.
Right-click the form and select View Code to see how to define functions of different controls used on the form.
Constants
This is an internal class that contains fields in string values that are summarizable.
GenreSales.rdlx-master
This is the master report for the Genre Sales report. It uses the Image, two Textbox and ContentPlaceholder controls to design the report. The Image control displays the logo on the top of the report while the two Textbox controls display the report execution time and page number information respectively. The ContentPlaceholder control displays its content report.
LayoutBuilder
This is the internal class file that contains code for creating the layout of both child reports and loading data in it.
Reports.xml
This XML file is used as a database to provide data for the reports in this sample.
ReportWizardState
This is the internal class file that contains code for handling the UI of the Report Wizard.
StoreSales.rdlx-master
This is the master report for the Store Sales report. It uses the Image, two Textbox and ContentPlaceholder controls to design the report. The Image control displays the logo on the top of the report while the two Textbox controls display the report execution time and page number information respectively. The ContentPlaceholder control displays its content report.
See Also