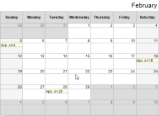
The Calendar report control is used to display date-based data or events in a calendar format in your report. In the Properties Window or the Calendar Dialog, you can modify the appearance of the days, months, weekends, and events in the calendar, and create events for it.
Calendar Dialog
Properties for the Calendar are available in the Calendar dialog. To open it, with the Calendar control selected on the report, under the Properties Window, click the Property dialog link.
The Calendar dialog lets you set properties on the report control with the following pages.
Note: You can select the <Expression...> option in many of these properties to create an expression to determine the value. For properties with enumerated values, the values are listed under Constants in the Fields tree view on the left side of the Expression Editor.
General
Name: Enter a name for the calendar that is unique within the report. You can only use underscore (_) as a special character in the Name field. Other special characters such as period (.), space ( ), forward slash (/), back slash (\), exclamation (!), and hyphen (-) are not supported.
Data
Dataset Name: Select a dataset to associate with the calendar. The list is populated with all of the datasets in the report's dataset collection.
Event Settings
Start Date: Enter an expression to use to identify the Start Date value(s) of the events to be displayed.
End Date: Enter an expression to use to identify the End Date value(s) of the events to be displayed.
Value: Enter an expression to use to identify the event text value(s) of the events to be displayed.
Detail Grouping
Name: Enter a name for the detail group that is unique within the report. A name is created automatically if you do not enter one.
Group on: Enter an expression to use for grouping the data. If you have already assigned a dataset name in the Dataset Name property, you can select a field from the dataset.
Filters
You need to provide three values to add a new filter to the collection: Expression, Operator, and Value.
Expression: Enter the expression to use for evaluating whether data should be included in the group.
Operator: Select from the following operators to decide how to compare the expression to the left with the value to the right.
- Equal Only choose data for which the value on the left is equal to the value on the right.
- Like Only choose data for which the value on the left is similar to the value on the right.
For more information on using the Like operator, see the MSDN Web site. - NotEqual Only choose data for which the value on the left is not equal to the value on the right.
- GreaterThan Only choose data for which the value on the left is greater than the value on the right.
- GreaterThanOrEqual Only choose data for which the value on the left is greater than or equal to the value on the right.
- LessThan Only choose data for which the value on the left is less than the value on the right.
- LessThanOrEqual Only choose data for which the value on the left is less than or equal to the value on the right.
- TopN Only choose items from the value on the left which are the top number specified in the value on the right.
- BottomN Only choose items from the value on the left which are the bottom number specified in the value on the right.
- TopPercent Only choose items from the value on the left which are the top percent specified in the value on the right.
- BottomPercent Only choose items from the value on the left which are the bottom percent specified in the value on the right.
- In Only choose items from the value on the left which are in the array of values specified on the right.
Selecting this operator enables the Values list at the bottom. - Between Only choose items from the value on the left which fall between the pair of values you specify on the right. Selecting this operator enables two Value boxes instead of one.
Value: Enter a value to compare with the expression on the left based on the selected operator. For multiple values used with the Between operator, the lower two value boxes are enabled.
Values: When you choose the In operator, you can enter as many values as you need in this list.
Event Appearance
Format: Select one of the common numeric formats provided or use a custom .NET formatting code to format dates or numbers. For more information, see MSDN's Formatting Types topic.
Alignment: Select the horizontal alignment of the event text.
Font
Family: Choose the font family name.
Size: Choose the size in points for the font.
Style: Choose Normal or Italic.
Weight: Choose from Lighter, Thin, ExtraLight, Light, Normal, Medium, SemiBold, Bold, ExtraBold, Heavy, and Bolder.
Color: Select a Web or custom color for the font.
Decoration: Choose from None, Underline, Overline, and LineThrough.
Background
Fill Color: Select a color to use for the background of the calendar event.
Border Color: Select a color to use for the border, or select the <Expression...> option to open the Expression Editor and create an expression that evaluates to a .NET color.
Image
You can display an image on all calendar events using the following options to define the image.
Source: Choose from External, Embedded, or Database.
MIME Type: Select the MIME type of the image chosen.
Value: Enter the name of the image to display.
Calendar Appearance
The Calendar Appearance page has the following tabs: Month Appearance, Day, Day Headers, Weekend, and Filler Day.
All but Day Headers have the same properties. (There is no Formatting section on the Day Headers tab.)
Font
Family: Choose the font family name.
Size: Choose the size in points for the font.
Style: Choose Normal or Italic.
Weight: Choose from Lighter, Thin, ExtraLight, Light, Normal, Medium, SemiBold, Bold, ExtraBold, Heavy, and Bolder.
Color: Select a Web or custom color for the font.
Decoration: Choose from None, Underline, Overline, and LineThrough.
Border
Style: Select a style for the border.
Width: Enter a value in points to set the width of the border.
Color: Select a color to use for the border, or select the <Expression...> option to open the Expression Editor and create an expression that evaluates to a .NET color.
Background Fill Color: Select a color to use for the background of the calendar's month section.
Formatting
Alignment: Select the horizontal alignment of the calendar month text.
Format: Select one of the common numeric formats provided or use a custom .NET formatting code to format dates or numbers. For more information, see MSDN's Formatting Types topic.
Navigation
Action
Select one of the following actions to perform when a user clicks on an event in the calendar.
None: The default behavior is to do nothing when a user clicks the textbox at run time.
Jump to report: For drill-through reporting, select this option and provide the name of a local report, the relative path of a report in another folder, or the full path of a report on another server.
Parameters: Supply parameters to the targeted report by entering the Name of each parameter, the Value to send to the targeted report, or whether to Omit the parameter. Note that parameter names you supply must exactly match parameters in the target report.
Tip: You can remove or change the order of parameters using the X and arrow buttons.Jump to bookmark: Select this option and provide a valid Bookmark ID to allow the user to jump to the report control with that Bookmark ID.
Jump to URL: Select this option and provide a valid URL to create a hyperlink to a Web page.
Document map label: Enter an expression to use as a label to represent this item in the table of contents (document map).
Bookmark ID: Enter an expression to use as a locator for this calendar. You will then be able to provide a bookmark link to this item from another report control using a Jump to bookmark action.
Data Output
Element Name: Enter a name to be used in the XML output for this calendar.
Output: Choose Auto, Yes, No, or Content only to decide whether to include this calendar in the XML output. Auto exports the contents of the calendar only when the value is not a constant.
See Also